Setting up Proton Mail: account, 2FA, and the settings that matter
Who is this for? For anyone who has created a Proton Mail account or is considering switching, and wants to configure it properly instead of staying on the default setup. Still unsure whether Proton Mail is the right choice? Read the Proton Mail review or Secure email without overkill first.
Setting up Proton Mail: account, 2FA, and the settings that matter
Who is this for? For anyone who has created a Proton Mail account or is considering switching, and wants to configure it properly instead of staying on the default setup. Still unsure whether Proton Mail is the right choice? Read the Proton Mail review or Secure email without overkill first.
What you gain, and what it costs
Setting up Proton Mail properly takes about fifteen minutes. In return:
- an account that does not rely on a password alone, and that you cannot permanently lock yourself out of by forgetting your password
- clarity on what Proton already handles by default, so you don’t flip a setting that doesn’t need it
- a clear migration path from Gmail without missing messages
Migrating itself takes more time — expect a few hours to a few days depending on your mailbox size — and is only worth it if provider privacy genuinely matters to you.
Step 1: Create your account
Go to proton.me and create a free account. You do not need to provide a phone number.
Use Tor or a VPN while creating the account if you do not want your IP address linked to the new account. Once created, Proton does not log IP addresses at login by default.
Step 2: The settings to enable immediately
Two-factor authentication (2FA)
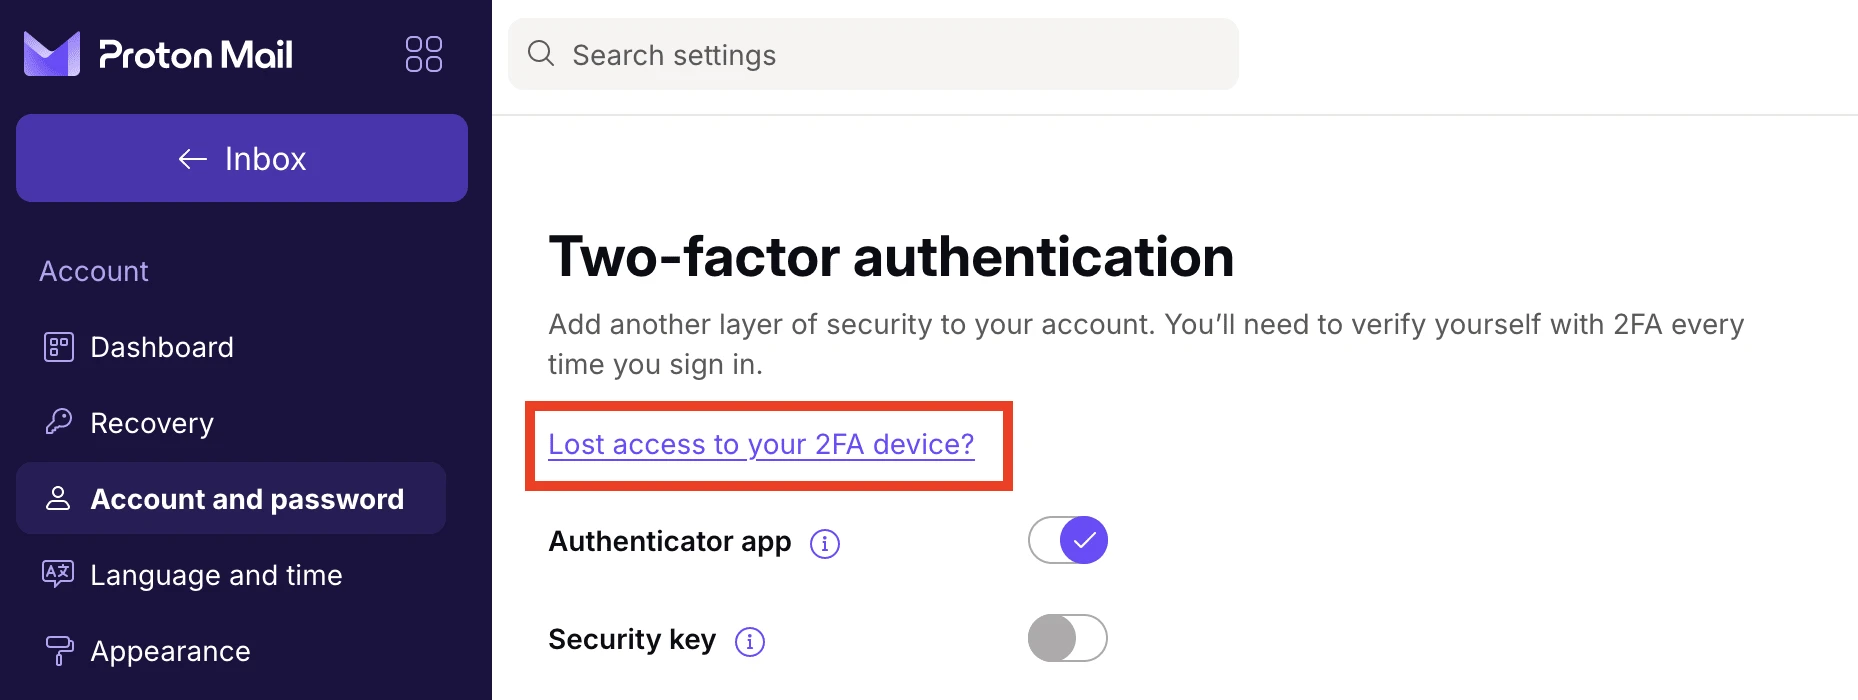
Go to Settings → Account and password → Two-factor authentication and link an authenticator app (for example Aegis on Android). This protects your account if your password is ever leaked.
Set a recovery phrase
Proton cannot reset your password if you lose it — Proton never stores your password, and without a recovery method it cannot recover your encrypted data either. Lose your recovery phrase and your password together, and that means permanent loss of access to your mailbox.
Go to Settings → Account and password → Recovery and generate a recovery phrase (12 words). This is the recommended primary method because it covers both password reset and recovering your encrypted data in one step — a recovery email address or phone number alone only covers password reset, not your data.
Print the recovery phrase or write it down, and store it separately from your devices — not as a screenshot, not in a notes app. Proton also recommends setting up a second password-reset method (such as a recovery email) and a second data-recovery method, so you are not entirely dependent on a single document.
External images: why you usually don’t need to touch this
Common advice for ordinary email providers is to turn off automatic image loading, since images can contain tracking pixels that tell the sender when you opened a message.
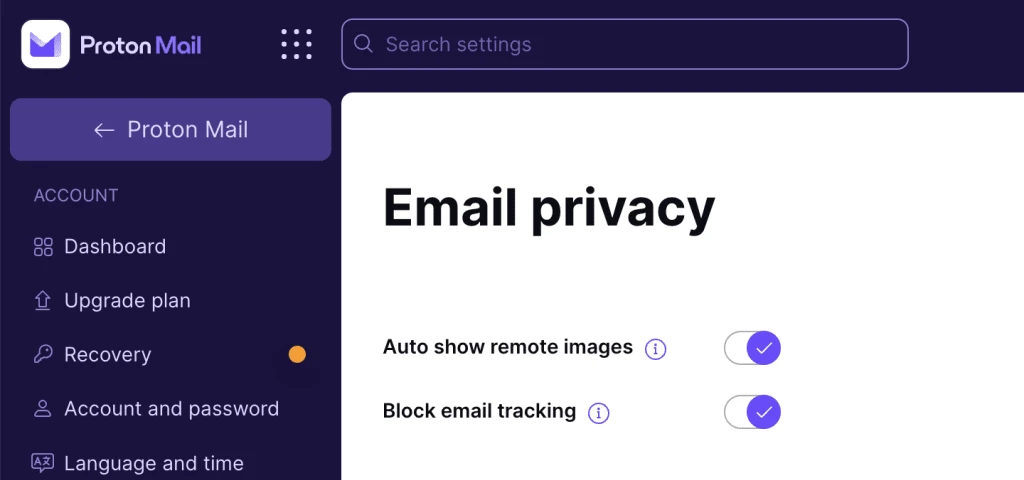
In Proton Mail, that is not a reason to turn the setting off yourself. “Auto show remote images” (Settings → Email privacy) is on by default, deliberately: Proton loads images as the message arrives, through its own proxy server, rather than when you actually open it — so your IP address and device information never reach the original sender or tracker. The “Block email tracking” toggle next to it handles this and is on by default for the same reason. This applies to ordinary, non-end-to-end-encrypted email — newsletters and regular incoming mail; Proton-to-Proton messages are already end-to-end encrypted regardless.
If you would still rather load images manually — for example because you prefer making no external request at all — you can still do that from the same setting. For most readers, though, this is not a setting that needs action.
Stopping point
For most readers, this is enough. An account with 2FA enabled and a safely stored recovery phrase is a solid baseline, whether you are starting from scratch or have used Proton Mail for a while without ever visiting these settings.
You do not need to read the rest of this guide if your situation does not call for it.
Step 3: Migrating from Gmail — if you are switching
Proton has a built-in import tool for moving existing Gmail messages over.
- Go to Settings → Import and export
- Start the import — this takes a few hours to a few days depending on your mailbox size
- Set up a forward in Gmail to your new Proton address so you do not miss mail during the switch
- Update your address gradually with the services you use regularly, starting with the most important: banking, government login, and cloud storage
You do not need to move everything in one evening. A gradual switch with an active forward is more reliable than a big-bang migration where you miss messages.
Step 4: Proton Bridge — if you want to use Thunderbird or another desktop client
Proton Mail works by default through the web interface and mobile apps. If you want to use a desktop email client like Thunderbird, Apple Mail, or Outlook, you need Proton Bridge.
Bridge is not free. It’s only included with a paid plan — Mail Plus or Proton Unlimited — not the free tier. Without a paid plan you get a 14-day free trial, after which you need to upgrade to keep using Bridge. Worth knowing before you build your whole workflow around a desktop client.
Bridge runs locally on your computer and translates the Proton API into standard IMAP/SMTP, so an ordinary email client can talk to your Proton account. In practice that means:
- Bridge must be actively running whenever you want to send or receive mail through your desktop client — close Bridge, and your client stops syncing
- Bridge works on Windows, macOS, and Linux, but check the current system requirements on proton.me before setting it up on an older machine or a less common Linux distribution
- first-time setup requires a separate Bridge password (not your regular Proton password) that Bridge generates specifically for linking your email client
For most readers who are happy with the web interface or mobile app, this is a deliberate, paid step — not something to expect automatically with a free account.
See the Thunderbird review for the client side of this setup, and the PGP practical guide if you also want to send encrypted mail to non-Proton recipients.
What these settings do not solve
- Subject lines are not end-to-end encrypted, even in Proton Mail. Never treat an email’s subject line as confidential.
- Email to non-Proton addresses travels outside Proton’s encrypted infrastructure unless you use PGP.
- Phishing remains a behaviour problem. 2FA protects your account, not against entering your password on a fake site yourself.
For communication that genuinely needs to stay confidential, Signal is structurally stronger than email — including Proton Mail.
Next step
Go further
- PGP practical guide — encrypted mail with non-Proton recipients
- Secure email without overkill — when Proton is enough and when you need more
- Setting up Signal — for communication email structurally cannot protect
Reviews
- Proton Mail review — background, caveats, and comparison with alternatives
- Thunderbird review — desktop client with PGP support